 العربية
Selling Price Groups Management in Aurpos
1. What Are Selling Price Groups?
Selling Price Groups allow you to sell the same product at different prices depending on the context, such as:
✅ Wholesale / Retail pricing
✅ Different prices for different locations
✅ Tiered pricing like bulk discount or VIP pricing
2. How to Add Selling Price Groups
Steps:
1️⃣ Go to Products → Selling Price Group
2️⃣ Click on "Add"
3️⃣ Enter a group name (e.g., Retail, Wholesale, Location A, Bulk Buyers)
4️⃣ Save the group
5️⃣ View and manage them from the Selling Price Group list screen

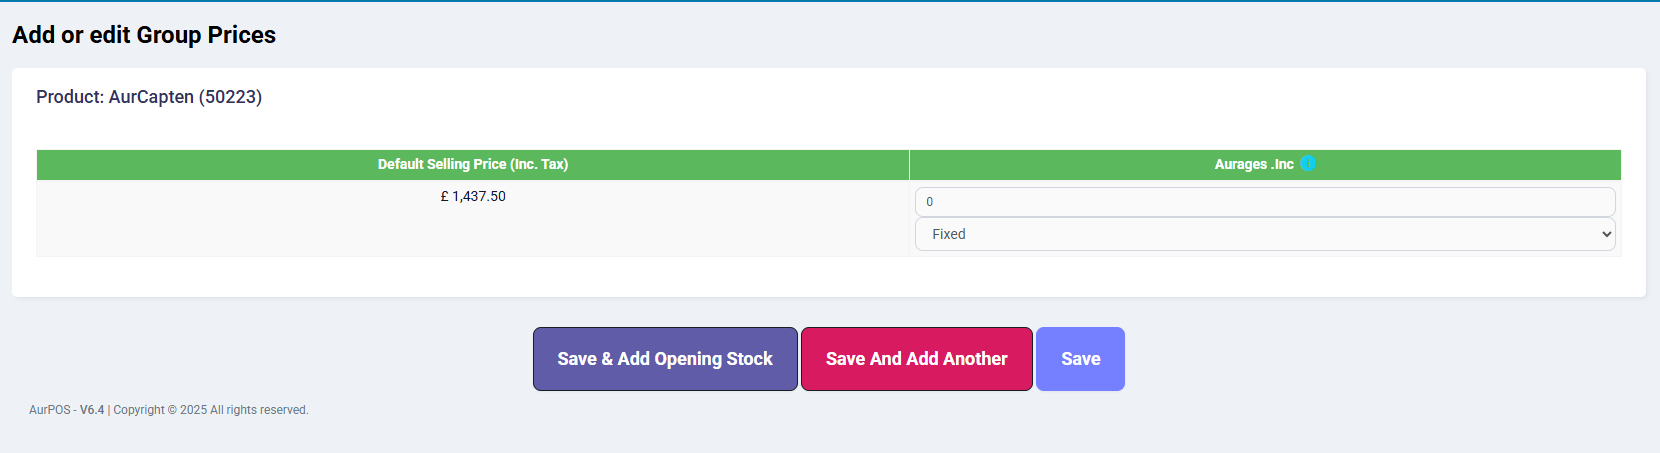
3. Setting Prices as Fixed or Percentage
You can define price in two ways:
- Fixed: Set an exact amount (e.g., $10)
- Percentage: Apply a % adjustment on the base price (e.g., 90% of base price)
4. Adding Prices to Products for Price Groups
Steps:
1️⃣ When adding/editing a product, click on "Save & Add Selling-price-group price" at the bottom
· Note: Button only appears if price groups exist
2️⃣ In the next screen, enter the prices for each group (including variations if any)
3️⃣ Click Save

5. Exporting & Importing Group Prices (Bulk Update)
Steps:
1️⃣ Go to Products → Update Price
2️⃣ Click “Export Product Prices” to download Excel
3️⃣ Edit group prices only (don’t touch SKU or product name)
- ⚠ Blank prices will be skipped
4️⃣ Re-import the file to apply changes
Read the price update
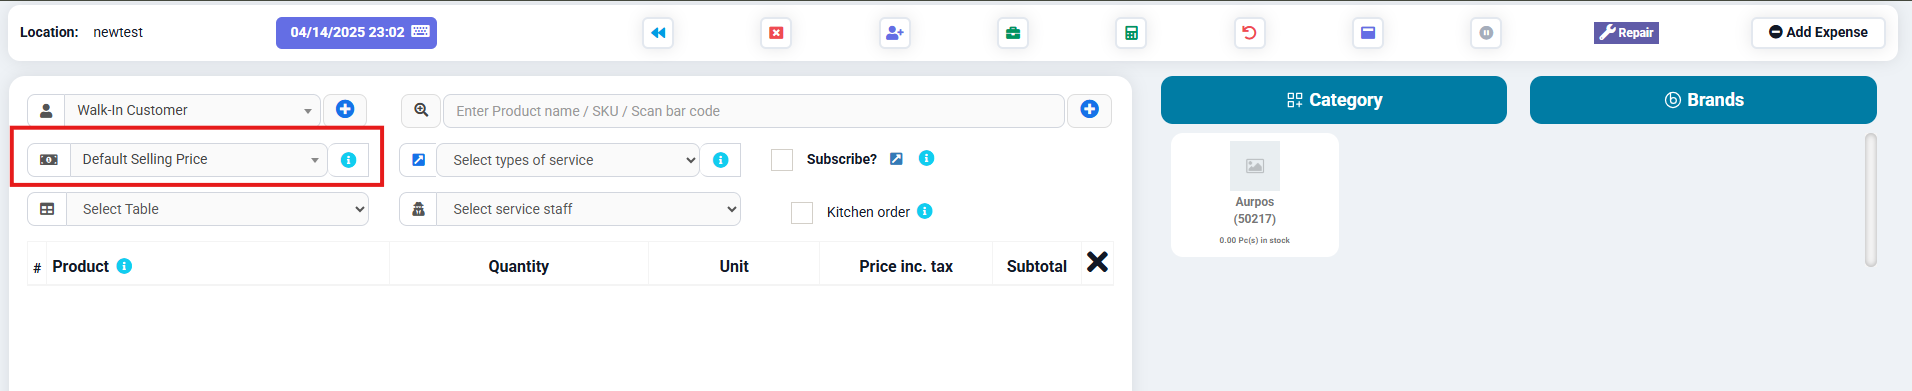
6. Using Price Groups in POS
Steps:
1️⃣ Go to POS screen
2️⃣ At the top, choose the Selling Price Group
- Only visible if multiple price groups are available or allowed
3️⃣ Once selected, prices shown for products will update accordingly
7. Assigning Price Groups
To Users:
- Create a role with access to specific price groups
- Assign the role to the user
- A role with selling permission must be linked to at least one price group
Read Role Management
To Customer Groups:
- Customers can’t be directly assigned to price groups
- Instead, assign price groups to the customer group they belong to
Read customer groups (Just change the price calculation type to Selling Price Group and select the price group you want to apply to the customer group)
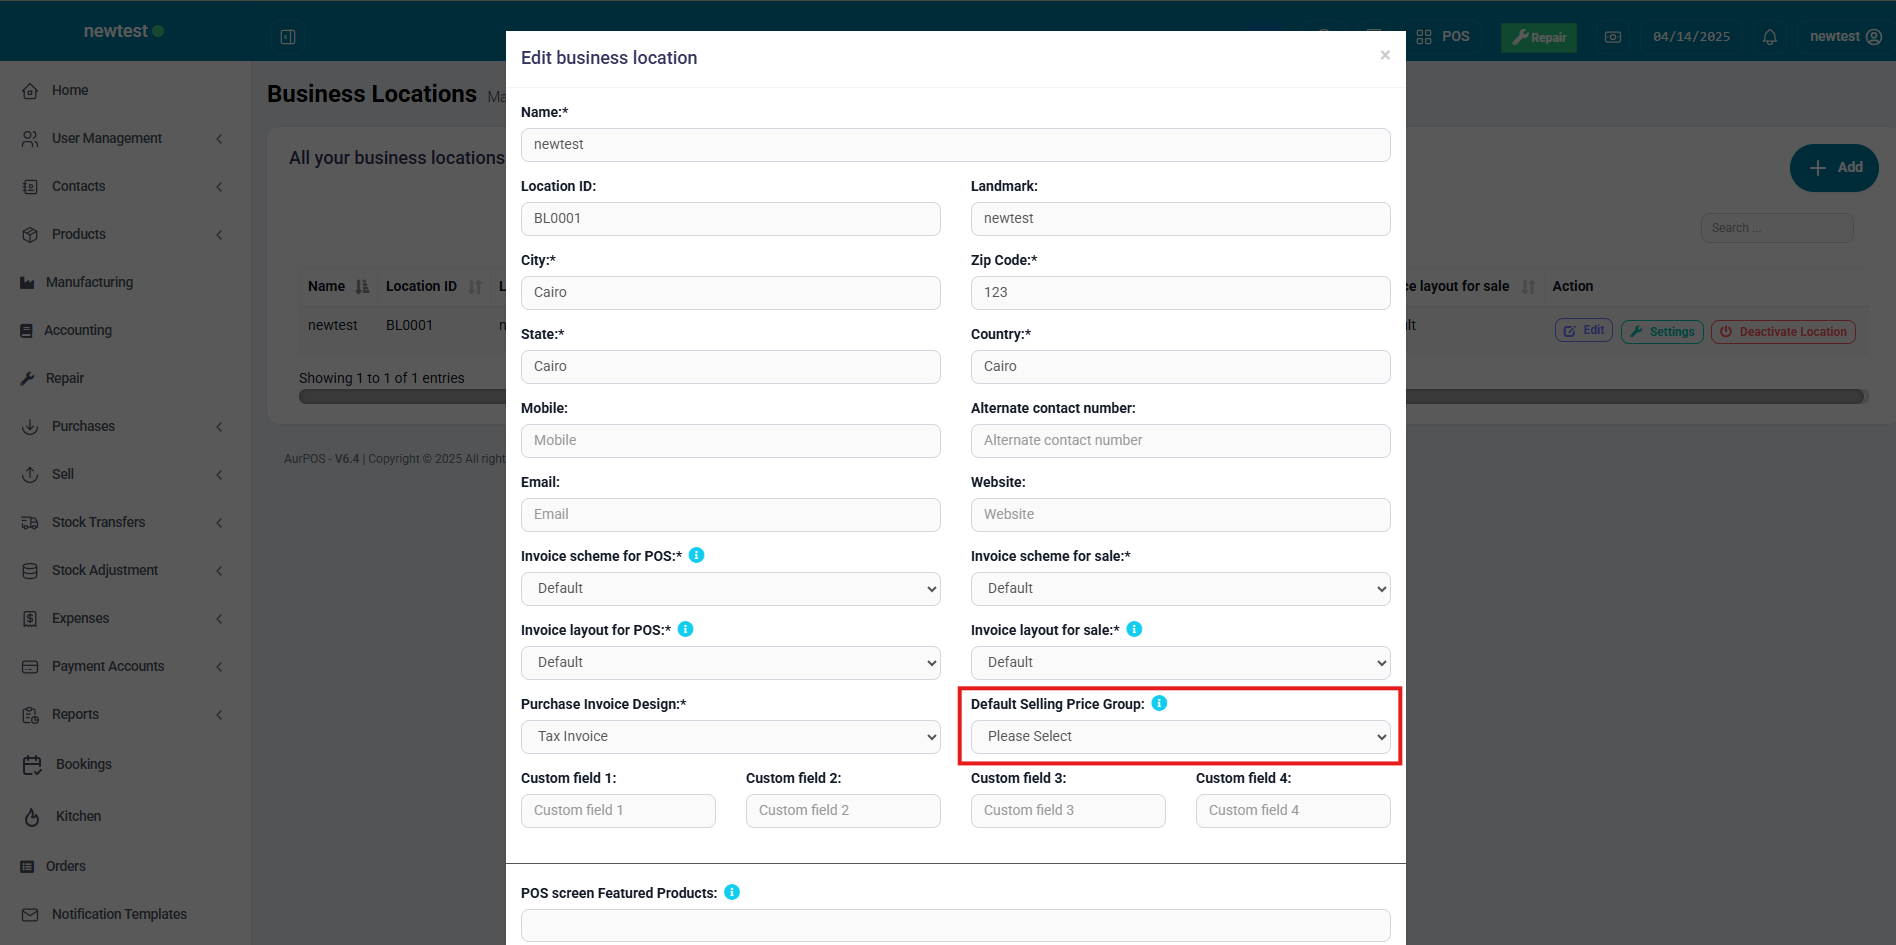
To Business Locations:
- Go to Add/Edit Business Location
- Set Default Selling Price Group
- If not set, default product price will apply
8. Restricting Price Group Access in POS (e.g., for Cashiers)
- Go to Add/Edit Roles
- Uncheck unwanted price groups for specific roles (e.g., restrict cashiers to one price group only)
Read Role Management
Tip: Selling Price Groups are great for tailoring your pricing strategy by customer type, location, or even sales volume — making your POS smarter and more flexible!