 العربية
⬜ Managing Selling Price Groups in AurPOS
The Selling Price Groups feature in AurPOS allows you to sell the same product at different prices based on customer type, branch, or sales method — giving you greater flexibility in your pricing strategy.
1️⃣ What are Selling Price Groups?
Selling Price Groups help you customize prices based on context, such as:
✅ Wholesale vs. Retail pricing
✅ Location-based pricing
✅ Volume discounts or special pricing for VIP customers
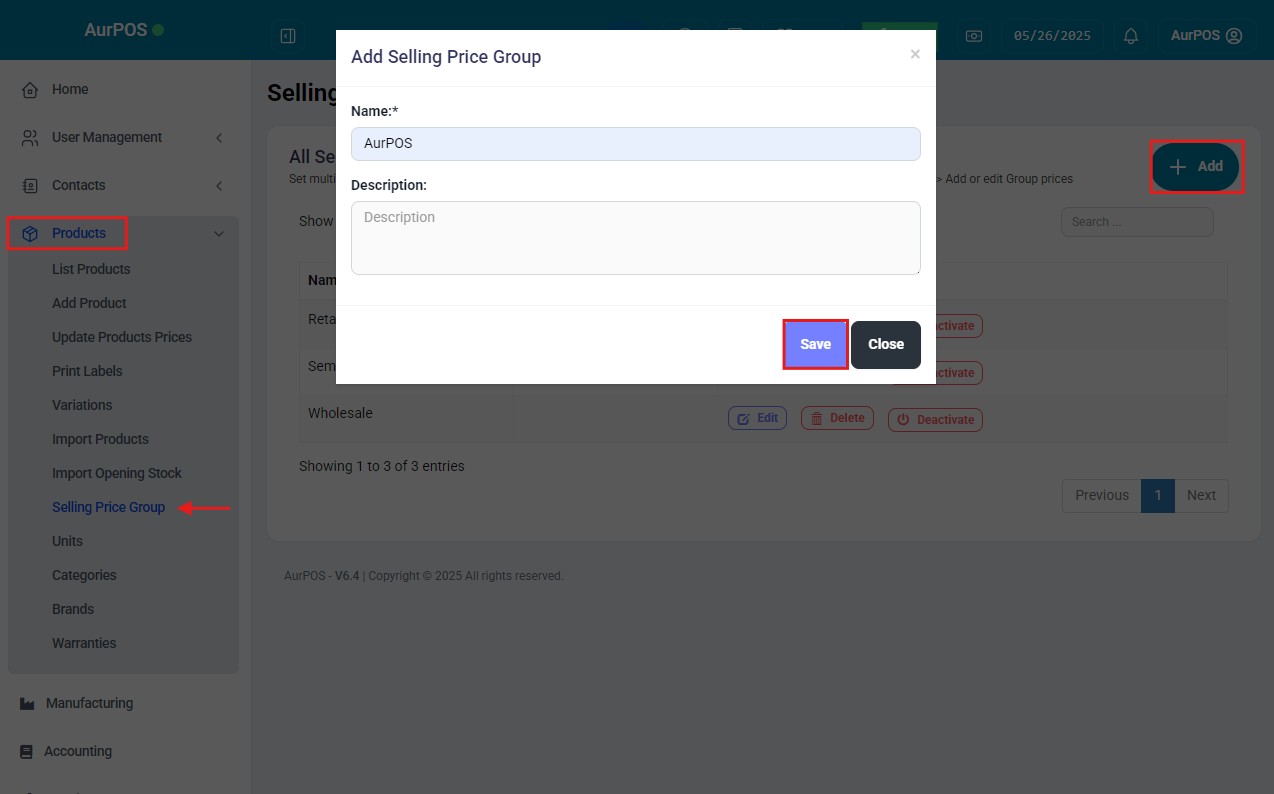
2️⃣ How to Add a New Selling Price Group
Steps:
-
Go to Products → Selling Price Groups
-
Click the "Add" button
-
Enter the group name (e.g., Retail, Wholesale, Branch 1, VIP Customers)
-
Click Save
-
You can manage all groups from the Selling Price Groups list screen
3️⃣ Set Prices as Fixed Value or Percentage
You can define prices within the group in two ways:
-
Fixed Value: e.g., 10 SAR
-
Percentage: e.g., 90% of the base price (automatic discount)
4️⃣ Add Product Prices for Each Group
Steps:
-
When adding or editing a product, click "Save & Add Selling Price Groups" at the bottom of the form
✳ This button appears only if at least one Selling Price Group has been created -
On the next screen, enter the price for each group (and for each variation, if available)
-
Click Save
5️⃣ Bulk Update Selling Price Groups (Export / Import)
Steps:
-
Go to Products → Update Prices
-
Click "Export Product Prices" to download the Excel file
-
Edit only the Selling Price Groups columns
⚠️ Do not change product names or SKU codes
⚠️ Blank fields will be ignored automatically -
Re-upload the file to apply changes
⮜ Read more: [Price Update]
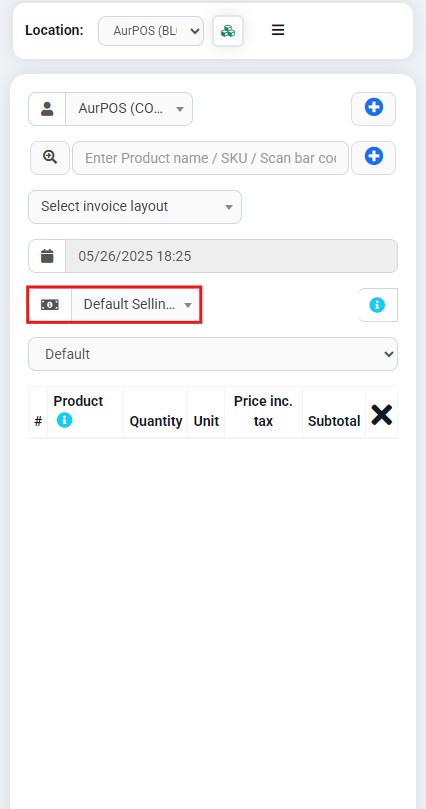
6️⃣ Use a Selling Price Group in the POS Screen
Steps:
-
Go to the Point of Sale screen
-
At the top, select the appropriate Selling Price Group
✳ This dropdown won't appear if no groups exist or if the user is limited to only one group -
Prices will update automatically based on the selected group

7️⃣ Assign Selling Price Groups to Users, Customers, and Branches
◼ For Users:
-
Create a role with the appropriate permissions and assigned price group(s)
-
The role must be linked to at least one group if it includes selling permissions
⮜ Read: [Role Management]
◼ For Customer Groups:
-
A price group cannot be assigned directly to an individual customer
-
Instead, assign it to the Customer Group they belong to
⮜ Read: [Customer Groups]
✳ Set "Price Account Type = Selling Price Group" and choose the appropriate group
◼ For Locations:
-
Go to Add / Edit Business Location
-
Set the default Selling Price Group
✳ If none is set, the base product price will be used by default

8️⃣ Hide Price Groups from Cashiers in POS
Steps:
-
Go to Add / Edit Role (e.g., Cashier role)
-
Uncheck the groups you don’t want this role to access
✳ Only the allowed price will appear in the POS screen for this role
⮜ Read: [Role Management]
✳️ Tip:
Use Selling Price Groups to tailor your pricing based on customer type, order volume, or location. This makes your POS system more flexible and professional — perfectly aligned with your business needs.