⬜ Managing Product Units in AurPOS
AurPOS allows you to handle products sold or purchased in different units (e.g., carton and piece), giving you greater flexibility and accuracy in inventory management.
1️⃣ Adding a New Unit
Steps:
-
Go to Products → Units
-
Enter the following details:
◾ Unit Name: e.g., Kilogram, Liter, Box, Piece
◾ Abbreviation: e.g., KG, L
◾ Allow Decimal Quantities: Enable this option if you want to sell/purchase in decimal amounts (e.g., 0.5 KG) -
Click Save to add the unit
2️⃣ Adding Multiple Units for the Same Product
Why use multiple units?
If you purchase a product in one unit (e.g., carton) and sell it in another (e.g., piece), using multiple units helps streamline operations and reduce inventory errors.
Steps:
-
Go to Products → Units
-
Add the larger unit (e.g., carton) and select the option to link it as a multiple unit
-
Add the smaller unit (e.g., piece)
-
Define the conversion rate between units (e.g., 1 carton = 12 pieces)
-
When adding or editing the product, choose the appropriate unit from the dropdown list


3️⃣ Important Notes on Units
⚠️ Important Warning:
-
The base unit (e.g., carton) will not appear in the unit selection on the sales screen
-
All transactions will be recorded using the smallest unit (e.g., piece)
-
Changing the conversion ratio after recording sales or purchases may affect inventory quantities
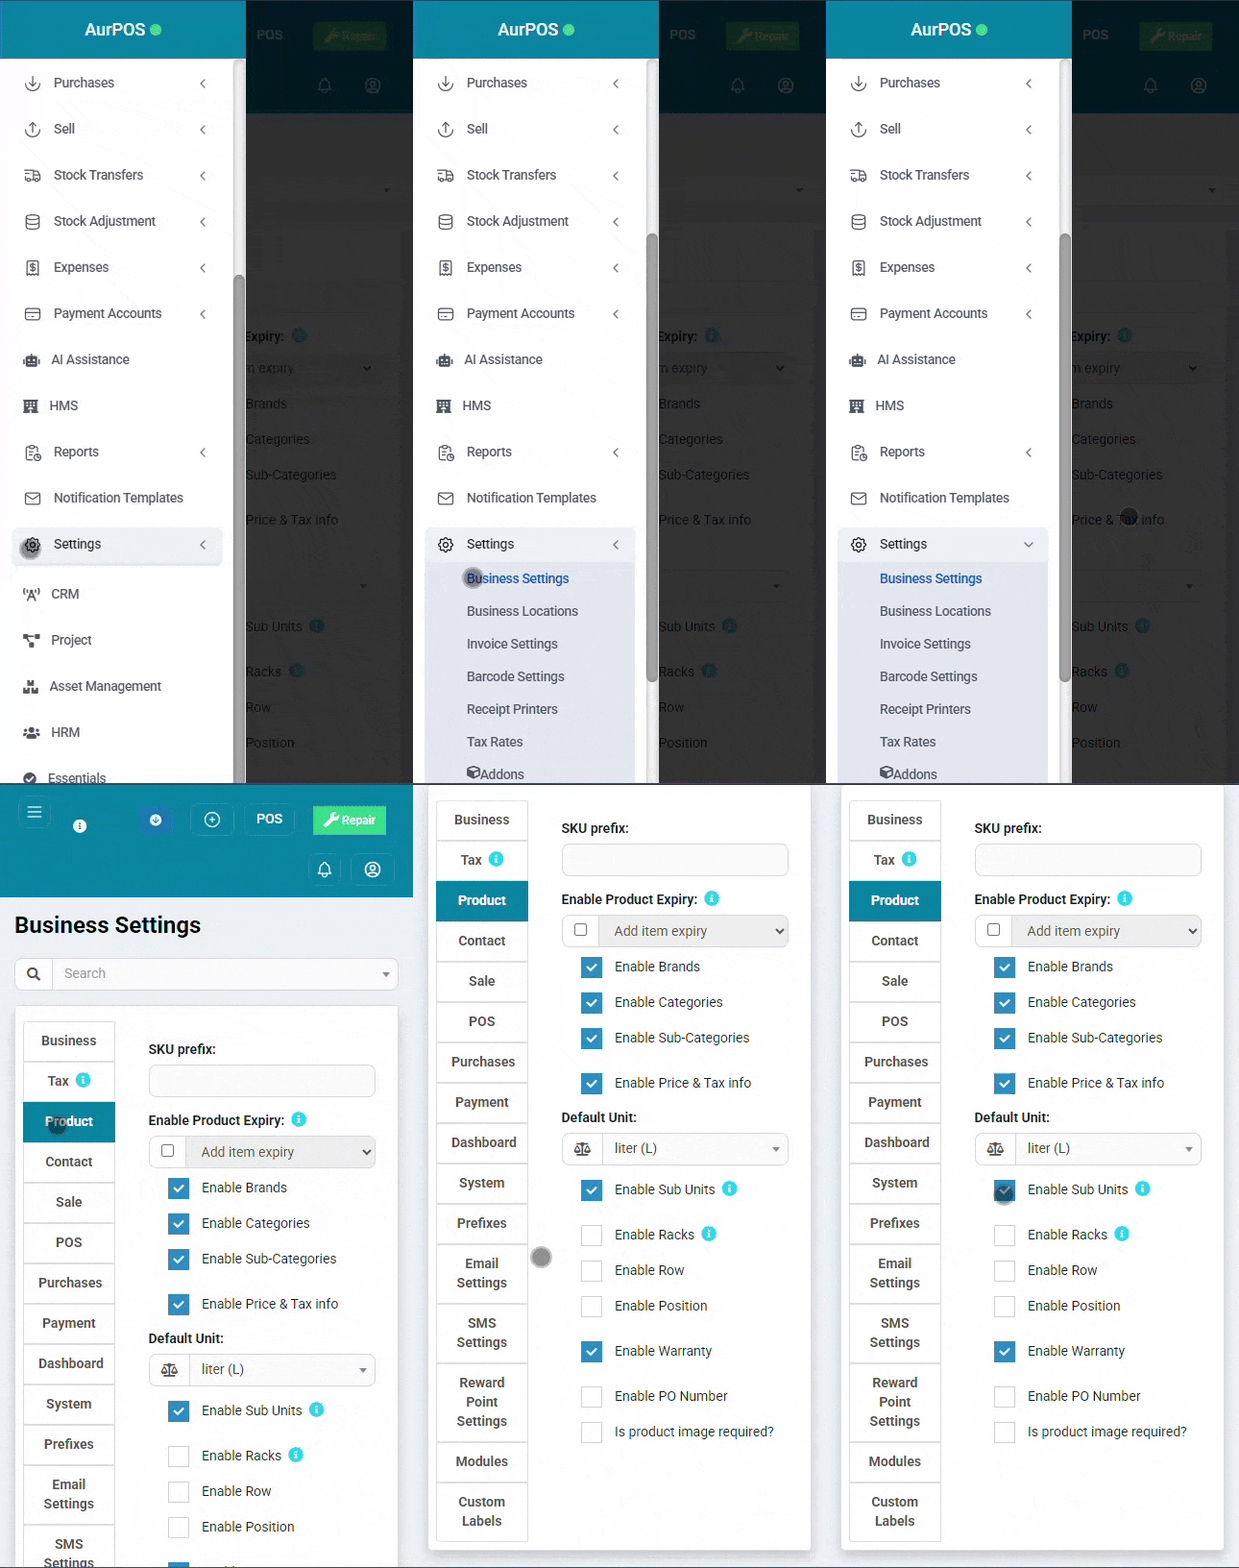
4️⃣ Enabling Related Sub-Units for Products
Steps:
-
Go to Settings → Company Settings → Product
-
Enable the option "Enable Related Sub-Units"
-
When adding a new product:
◾ Select the base unit
◾ Add multiple sub-units as needed -
These sub-units can then be used in both sales and purchases


✳️ Tip:
Using multiple units in AurPOS helps you manage your inventory more accurately and minimizes pricing and quantity errors across sales and purchases.
 العربية