 العربية
⬜ Printing Product Labels in AurPOS
AurPOS provides an integrated tool for printing customized product labels, including barcodes and key product information.
1️⃣ What is the Product Label Printing Feature?
○ This feature allows you to:
-
Print labels that include product name, price, barcode, and other selected data
-
Organize products efficiently in-store or in your inventory
-
Streamline sales processes by enabling barcode scanning at the POS
2️⃣ Where to Access the Label Printing Screen
○ You can access the label printing feature from multiple areas within the system:
✅ From the Product List:
Go to Items → Print Labels
✅ From Product View:
Go to Items → Product List, then click Options → Labels to add the product to the print queue
✅ From the Purchase List:
Go to Purchases → Purchase List, then click Options → Labels to add all products from a specific invoice to the queue
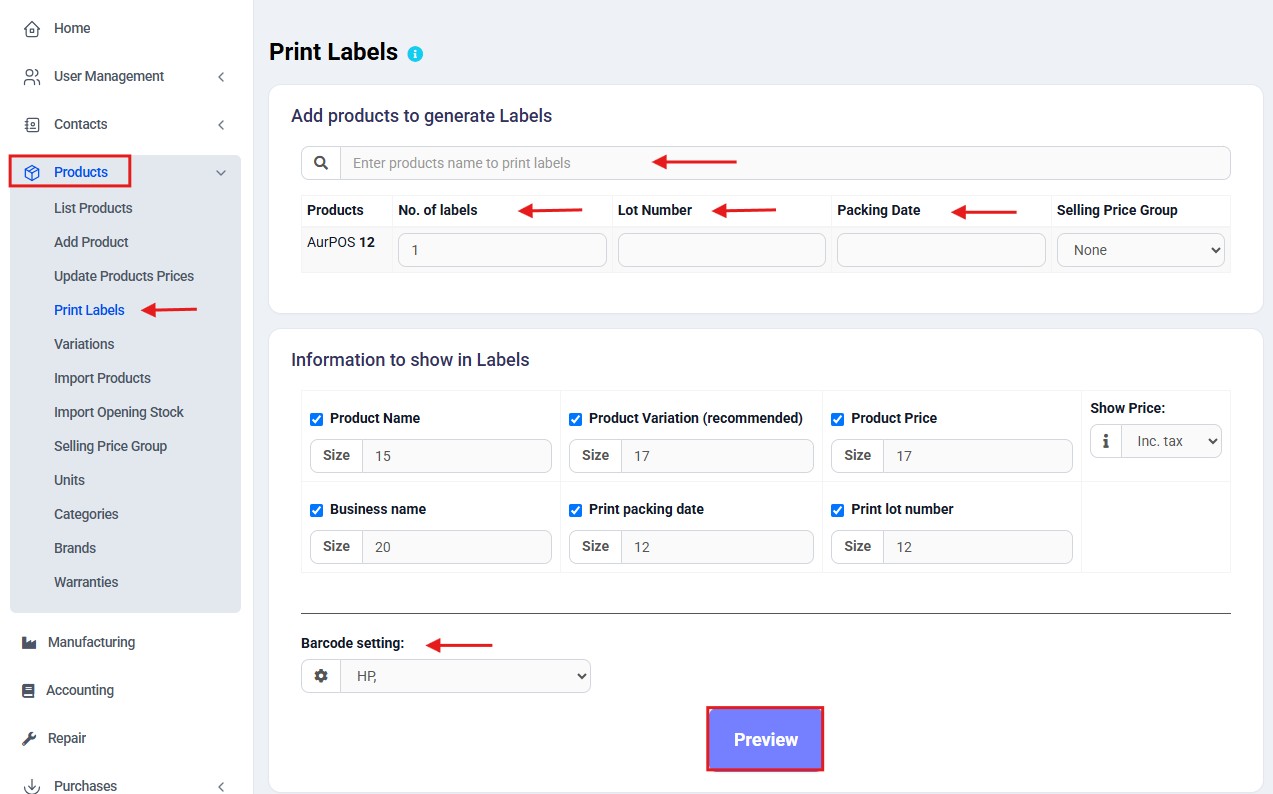
3️⃣ Steps to Print Product Labels
○ Steps:
✅ Add Products to the Print Queue:
Search for the product using its name, SKU, or barcode
✅ Set the Label Quantity:
Specify how many labels to print per product
✅ Choose the Displayed Information:
Select or unselect fields you wish to display under "Label Information"
✅ Select Barcode Type:
Choose a label layout based on the paper type used
✔ The system includes ready-made templates
✔ You can add new ones from Settings → Barcode Settings
✅ Preview the Labels:
Click Preview to check the final look of the labels before printing
✅ Print the Labels:
If everything looks correct, click Print
⚠️ Note: Make sure your browser’s print margin settings are set to “Default” for optimal results
4️⃣ Common Printing Errors
○ Error Message:
“Unsupported SKU id for the selected barcode type”
○ Reason:
The SKU code entered is not compatible with the selected barcode format
○ Solution:
-
Open the product in question
-
Change the barcode type to Code 128
-
Save the changes and try printing again
✳️ Tip:
If some data doesn’t appear properly due to label size, you can hide some fields or use the 20 labels per sheet setting for better formatting.