 العربية
⬜ Product Management in AurPOS
AurPOS allows you to add all types of products (simple, variable, composite), with flexible inventory, barcode, and sales settings tailored to your business needs.
1️⃣ Add a New Product
○ Go to Items → Add Products
○ Start by filling in the basic details:
-
Product name
-
Brand
-
Unit
-
Category and subcategory
-
Product image (optional)
✳ Note: You can create or modify units from the system settings.
2️⃣ Setting SKU and Barcode
○ In the same form, you’ll find:
-
SKU (Product Identifier):
-
You can enter it manually or leave it blank to generate automatically
-
You may also set a Prefix for automatically generated SKUs
-
-
Barcode Type:
-
The default and recommended type is C128
-
Change it only if the product has a specific barcode
-
3️⃣ Visibility and Stock Settings
○ Within the same form:
-
Not for Sale:
When enabled, the product will not appear in sales or POS screens -
Stock Alert Quantity:
To receive notifications when stock reaches a low threshold -
Inventory Tracking:
Enable if you want to track available quantities
✳ Not required for services (like haircuts, repairs...) -
Business Location:
Define the branches where the product can be sold or purchased
4️⃣ Types of Products in AurPOS
○ Single Product:
Used when the product has no variations or options.
○ Variable Product:
Used when the product has multiple options like size or color.
○ Composite (Combo) Product:
A group of products sold as a single item.
5️⃣ Using Barcodes in the System
○ The barcode (SKU) is used in:
-
POS
-
Sales screen
-
Purchase screen
-
Reports
✳ To add a product with an existing barcode:
-
Go to Add Product
-
In the SKU field, scan or enter the barcode number
6️⃣ Add Product Quantity
You can add product quantities in three ways:
-
When adding the product for the first time (Opening Stock)
-
Through Purchase Invoices
-
Through Manufacturing (requires manufacturing unit to be enabled)


7️⃣ Importing Products in Bulk
○ Steps:
-
Download the Excel file from the Products page
-
Fill in the required data
-
Make sure columns match the import template
-
Use the Import Items feature to upload the file
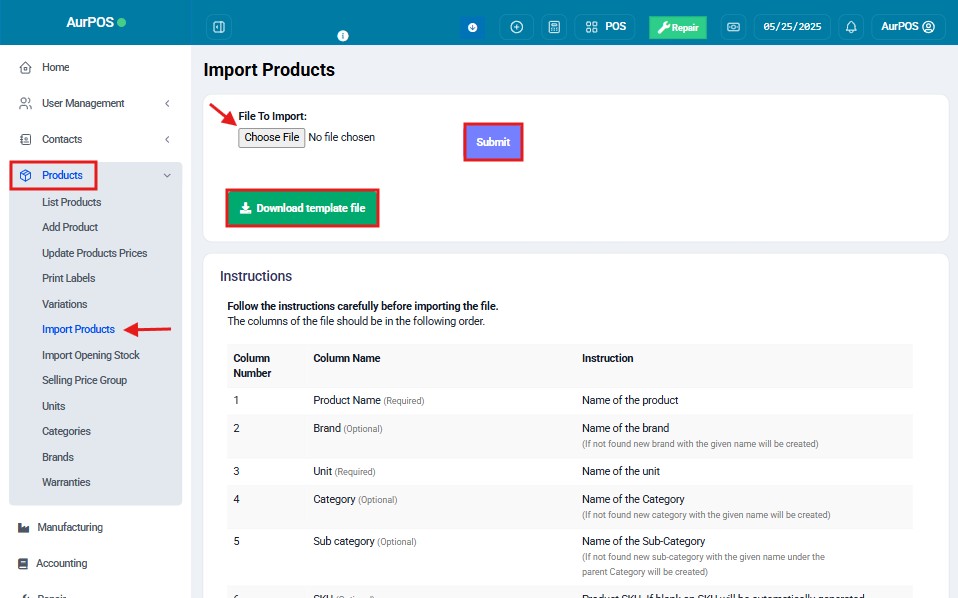
⚠️ Important Note
Make sure your data is accurate before importing to avoid errors.